Tattoo removal is a medical procedure, not a simple cosmetic routine. The U.S. Food and Drug Administration explains that laser removal usually requires multiple sessions, and complete clearance is not guaranteed. Skin type, ink depth, pigment color, and healing response all influence the result.
The American Academy of Dermatology warns that burns, pigment changes, infection, and scarring can occur. Professional assessment matters. A trained dermatologist or qualified laser practitioner should inspect the tattoo, review medical history, and perform a conservative patch test before broader treatment. Small details matter. Clean gloves. Eye protection. Correct wavelength. Adequate cooling.
This guide explains how to safely operate a tattoo removal machine without scarring, while recognizing that “scar-free” results cannot be promised. The safest approach uses evidence-based settings, documented skin responses, and enough healing time between sessions. Rushing treatment can create blistering, prolonged redness, or permanent texture changes.
Industry guidance also emphasizes informed consent and realistic expectations. The FDA notes that tattoo pigments may respond unpredictably, especially cosmetic inks containing light colors. The AAD recommends seeking professional care rather than attempting unsupervised removal. That recommendation deserves respect.
Some instructions may seem overly cautious. They are. Yet a cautious treatment can still fail when the operator ignores skin tone, recent sun exposure, or aftercare. A machine’s power is not proof of expertise. Careful observation is.
Throughout this article, safety remains the priority: evaluate the skin, select appropriate settings, protect the eyes, monitor each response, and stop when warning signs appear. Professional supervision is strongly advised.
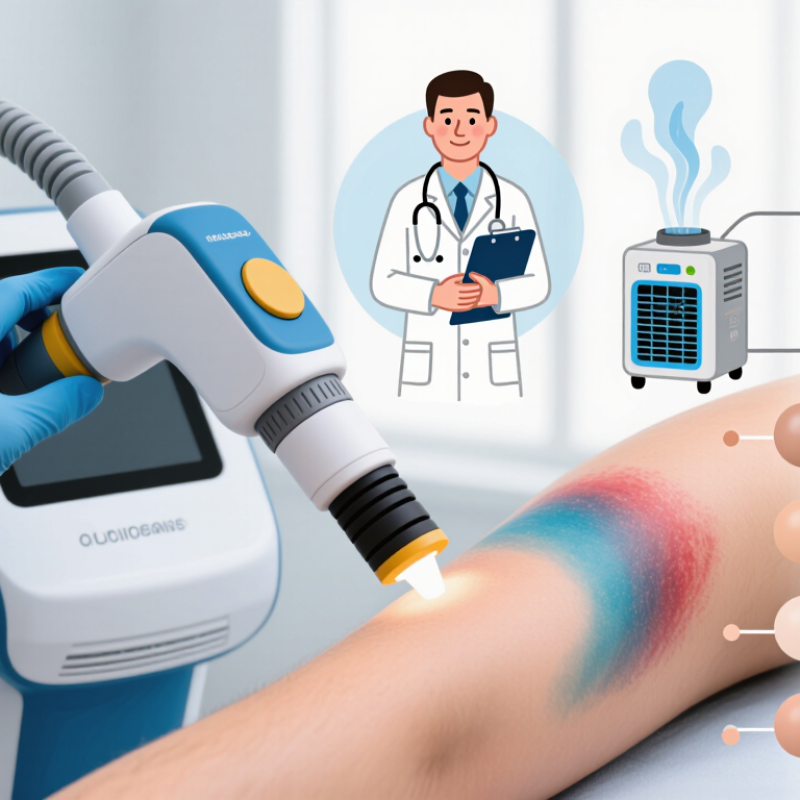
Safe tattoo removal begins with understanding the method, not choosing the strongest machine. Q-switched and picosecond lasers break pigment into smaller particles for natural clearance. Each wavelength targets different colors. Black ink usually responds better than green, yellow, or white ink. The American Academy of Dermatology reports that many people need six or more sessions, commonly spaced six to eight weeks apart. More power is not always better.
Skin safety depends on assessment. A qualified medical professional should review skin tone, ink depth, previous reactions, medications, and scar history. The Fitzpatrick skin type helps guide settings, especially for darker skin, where pigment changes can occur. A 2022 review in Lasers in Medical Science found clearance outcomes varied widely across studies, influenced by pigment color, density, and treatment intervals. The figures are not promises. Some tattoos fade unevenly.
Tips: Request a patch test before treating a large area. Photograph the skin before each session. Clean the handpiece and use appropriate eye protection. Do not pick blisters or remove crusts. Keep the area dry as directed, then use broad-spectrum sunscreen after healing. Seek medical care for spreading redness, severe pain, pus, or delayed healing. Home use is risky. I understand the temptation, but controlling energy without skin training can create burns, texture changes, or permanent discoloration. Even professional protocols need adjustment. Skin sometimes reacts differently than expected.
Approximate skin-healing windows by tattoo removal method
The chart shows commonly reported healing windows rather than guaranteed results. Laser removal usually causes temporary redness, swelling, blistering, or crusting for about 7–14 days when appropriate settings and aftercare are used. Surgical excision, dermabrasion, and salabrasion may require longer wound care and can carry a higher risk of visible scarring or pigment changes.
To reduce scarring risk, tattoo removal should be performed by a qualified medical professional after a skin assessment and test spot. Do not treat tanned, sunburned, infected, or irritated skin, and do not pick blisters or scabs. Seek medical care for spreading redness, severe pain, pus, fever, or delayed healing.
Before each tattoo removal treatment, inspect the skin under bright, neutral light. Look for sunburn, fresh tanning, cuts, rashes, raised scars, or signs of infection. Do not treat compromised skin. A qualified practitioner should review medical history, healing patterns, medications, and pigment changes. Confirm informed consent and take dated photos. They create a useful record, not just paperwork. Remove makeup, creams, and surface oils with a gentle cleanser. Shave only when needed, using a clean disposable razor. Never scrub hard.
Prepare the equipment in a clean, well-ventilated area. Follow the device instructions and local professional requirements. Check the handpiece, cables, cooling system, protective eyewear, and emergency controls. Disinfect reusable surfaces with a compatible product, then let them dry fully. Use single-use items once. Test a small area when clinically appropriate. Conservative settings are safer than chasing dramatic results. Skin response varies.
Before treatment, make sure protective eyewear fits securely for everyone nearby. Mark the tattoo clearly, avoiding moles or suspicious lesions. Keep cooling supplies ready, and stop if the skin shows unusual whitening, blistering, or severe pain. One detail is easy to underestimate: rushing preparation. It can turn a manageable session into a preventable injury. I would rather pause and reassess than continue with uncertain settings. Proper training, careful records, and patience matter more than speed.
| Step | Preparation Area | Evidence-Based Safety Standard | Document or Confirm | |
|---|---|---|---|---|
| 1 | Practitioner qualification | Confirm that the operator is trained and legally authorized to use the specific laser or light-based device. | Required Laser tattoo removal can cause burns, pigment changes, scarring, and eye injuries when performed incorrectly. |
Training, authorization, and device-specific competency. |
| 2 | Client screening | Review medical history, medications, allergies, healing problems, previous reactions, and any history of abnormal scarring. | Required Postpone treatment when risk factors or uncertain medical conditions require assessment by a qualified clinician. |
Signed consultation and informed consent. |
| 3 | Skin inspection | Examine the tattoo and surrounding skin for infection, open wounds, active dermatitis, sunburn, blisters, or unresolved irritation. | Required Do not treat compromised or infected skin. Allow the area to heal before reconsidering treatment. |
Skin condition and treatment decision. |
| 4 | Sun and tanning check | Ask about recent sun exposure, tanning beds, self-tanner, or tanning products. Remove temporary color products according to professional protocol. | Required Recent tanning can increase the risk of burns and unwanted lightening or darkening of surrounding skin. |
Date of last significant exposure and skin appearance. |
| 5 | Treatment photography | Take clear, consistent photographs before treatment, using the same lighting, distance, and camera angle whenever possible. | Recommended Photographs help track fading, healing, pigment changes, and unexpected reactions over time. |
Pre-treatment images with date and treatment area. |
| 6 | Skin cleansing | Clean the treatment area with an appropriate skin cleanser and allow it to dry. Remove lotions, oils, makeup, and adhesive residue. | Required Clean, dry skin reduces contamination and helps prevent substances on the surface from interfering with treatment. |
Cleansing completed and skin fully dry. |
| 7 | Hair and surface preparation | Manage hair only when necessary and according to clinic protocol. Do not use irritating products immediately before treatment. | Recommended Avoid unnecessary shaving, exfoliation, or chemical products that may increase irritation or inflammation. |
Preparation method and any skin sensitivity noted. |
| 8 | Eye protection | Provide wavelength-appropriate protective eyewear for the client and everyone in the treatment area before activating the device. | Critical protection Protective eyewear must match the device wavelength and optical density requirements; ordinary sunglasses are not sufficient. |
Eyewear type, fit, and condition checked. |
| 9 | Equipment inspection | Inspect the handpiece, lens or output window, cables, footswitch, cooling system, emergency stop, and warning indicators. | Required Do not use equipment with damaged parts, blocked ventilation, fluid leaks, error messages, or overdue servicing. |
Pre-use inspection and service status. |
| 10 | Room and infection control | Clean high-touch surfaces, use fresh protective barriers, prepare sterile or single-use items where required, and keep the treatment area uncluttered. | Required Follow local infection-control requirements and the device manufacturer's cleaning instructions. |
Room cleaning and barrier setup completed. |
| 11 | Patch or test area | When clinically appropriate, perform a small test area using settings selected by a qualified practitioner and observe the response before broader treatment. | Recommended Test spots may help assess skin response, but they do not eliminate the risk of burns, pigment changes, or scarring. |
Test location, settings, response, and review date. |
| 12 | Device settings | Select wavelength, spot size, pulse duration, fluence, and repetition rate only from the device protocol and the practitioner's clinical assessment. | Required Do not copy settings from another client or tattoo. Skin type, ink characteristics, tattoo depth, and device design all affect risk. |
Device model, settings, operator, and treatment area. |
| 13 | Cooling and comfort plan | Prepare the approved cooling method and agree on a stop signal. Monitor discomfort, whitening, blistering, bleeding, and excessive swelling during treatment. | Safety measure Cooling may reduce discomfort and thermal injury, but it must be used according to the device and clinical protocol. |
Cooling method and observed skin response. |
| 14 | Final go/no-go check | Confirm consent, correct treatment area, eye protection, clean dry skin, functioning equipment, and an emergency plan before firing the device. | Required Stop and reassess if any safety requirement is missing or if the skin appears more irritated than during the consultation. |
Final checklist signed before treatment. |
Safe settings begin with assessment, not the machine’s highest power. A qualified clinician should record Fitzpatrick skin type, tattoo colors, ink depth, scarring history, medications, and recent sun exposure. The American Academy of Dermatology notes that removal commonly requires six or more sessions, with healing time between them. Published dermatology reviews report clearance rates ranging from roughly 20% to 95%, depending on ink and skin response.
For lighter skin, dark black or blue ink may tolerate a different starting approach than red, yellow, or white pigment. Darker skin needs extra caution. Lower initial energy, suitable spot size, effective cooling, and a test patch can reduce pigment injury risk. Exact settings still depend on wavelength, pulse duration, and device design. Observe the test patch before treating a larger area. A dramatic first response is not the goal.
Skin that tans easily may develop temporary light or dark marks after treatment. The U.S. Food and Drug Administration recommends trained operators and formal laser safety controls, rather than copied online settings. Conservative treatment is easier to correct than an aggressive burn. I still treat every first session as a learning point, not proof of perfect settings. Stop and reassess if blistering, severe pain, spreading redness, or thickening appears.
Safe tattoo removal begins with a controlled procedure, not maximum power. A qualified laser practitioner should inspect skin type, ink colors, tattoo depth, medications, and healing history. The U.S. Food and Drug Administration reports that removal often requires multiple sessions, and complete clearance is not guaranteed. A conservative patch test can reveal unexpected swelling or pigment changes before treating the full design.
During treatment, use wavelength settings matched to the ink, protective eyewear, clean equipment, and active cooling. Treat one small section first. The skin may feel like hot elastic snapping against it. Stop if whitening, excessive bleeding, or severe pain appears. A 2022 review in Lasers in Medical Science identified blistering, scarring, and pigment alteration as possible complications, especially when treatment is too aggressive. More energy is not always better.
Leave adequate healing time between sessions, often several weeks, according to the clinician’s assessment. Keep the area clean, avoid picking crusts, and protect healing skin from sunlight. Report spreading redness, pus, fever, or worsening pain promptly. Follow-up photographs under consistent lighting help track progress honestly. Results can be uneven. Even careful protocols are not perfect. A thoughtful practitioner should adjust settings after each response, rather than repeating the same plan automatically. The American Society for Laser Medicine and Surgery also emphasizes trained supervision, informed consent, and realistic expectations for laser procedures.
Using a tattoo removal machine safely depends on recognizing complications early and protecting the skin afterward. The U.S. Food and Drug Administration lists burns, blistering, infection, scarring, and pigment changes among possible laser-related injuries. These warnings are not theoretical. A systematic review in Lasers in Medical Science found that pigment changes appeared more often than permanent scarring, although reported rates varied between studies and skin types.
Stop immediately.
Increasing power over dark, swollen skin can deepen tissue injury. A trained medical professional should assess skin tone, tattoo density, ink color, and previous scars before treatment. Test spots can reveal delayed reactions, but they cannot guarantee a complication-free session. I have seen people mistake normal redness for permission to continue. That is a risky assumption.
After treatment, keep the area clean and lightly protected according to clinical instructions. Do not pick. Avoid friction, tanning, swimming, and unapproved creams while blisters or crusts remain. The American Academy of Dermatology Association identifies prolonged redness, pus, worsening pain, fever, and spreading warmth as warning signs requiring medical evaluation. Darker skin may develop post-inflammatory hyperpigmentation or light spots, sometimes lasting months. A 2022 review in the Journal of Cosmetic and Laser Therapy also emphasized that pigmentary complications depend on wavelength, energy settings, and individual skin response. Healing takes time. Any scar, color change, or delayed reaction deserves documentation and professional review rather than another unsupervised session.
Inspect the area under bright, neutral light. Look for sunburn, tanning, cuts, rashes, raised scars, or infection. Do not treat damaged skin. Review medical history, medications, healing patterns, and pigment changes before proceeding.
Dated photos record the skin’s starting condition. They help compare redness, swelling, pigment changes, and healing later. They are more than paperwork. Clear records can expose problems that memory misses.
Remove makeup, creams, and surface oils with a gentle cleanser. Shave only when necessary with a clean disposable razor. Avoid hard scrubbing. Irritated skin may react poorly.
Work in a clean, well-ventilated area. Check the handpiece, cables, cooling system, eyewear, and emergency controls. Disinfect reusable surfaces with a compatible product, then let them dry fully. Use single-use items once.
A test spot may reveal delayed skin reactions when clinically appropriate. It cannot guarantee safe healing. Conservative settings are safer than chasing dramatic results. Skin response varies.
Stop if unusual whitening, blistering, or severe pain appears. Do not increase power on dark, swollen skin. That can deepen tissue injury. Reassess instead. I would rather pause than guess.
Keep the area clean and lightly protected according to clinical instructions. Do not pick blisters or crusts. Avoid friction, tanning, swimming, and unapproved creams during healing. Healing takes time.
Seek evaluation for pus, worsening pain, fever, spreading warmth, or prolonged redness. Document scars, color changes, or delayed reactions. Darker skin may develop light spots or darker patches lasting months. Another unsupervised session may worsen the problem.
Safe tattoo removal begins with understanding how different methods affect the skin and why professional assessment is essential. Before treatment, inspect the tattoo and surrounding area, confirm the person’s skin type and medical history, cleanse the skin, use appropriate eye protection, and check that the equipment is clean and functioning correctly. The goal of how to safely operate a tattoo removal machine without scarring is to use conservative settings, adjust them gradually for tattoo color, ink depth, and skin response, and avoid treating irritated, tanned, or damaged skin.
A controlled procedure should use proper positioning, consistent movement, adequate cooling, and sufficient recovery time between sessions. Never increase intensity simply to speed up results. After treatment, protect the area from friction, excessive moisture, sun exposure, and picking, while following suitable aftercare guidance. Increasing pain, spreading redness, severe swelling, pus, blistering, or unusual color changes may indicate complications and require prompt medical evaluation. Patience, careful monitoring, and qualified supervision are essential for reducing the risk of burns, pigment changes, and permanent scarring.
